Working with Components
Categories:
Configuring Components 🔗
Once you’ve added components to your design in Kanvas, configuring them is a critical step in customizing and optimizing your cloud-native infrastructure. Configuring components allows you to fine-tune their behavior, set specific parameters, and ensure they meet the precise needs of your architecture.
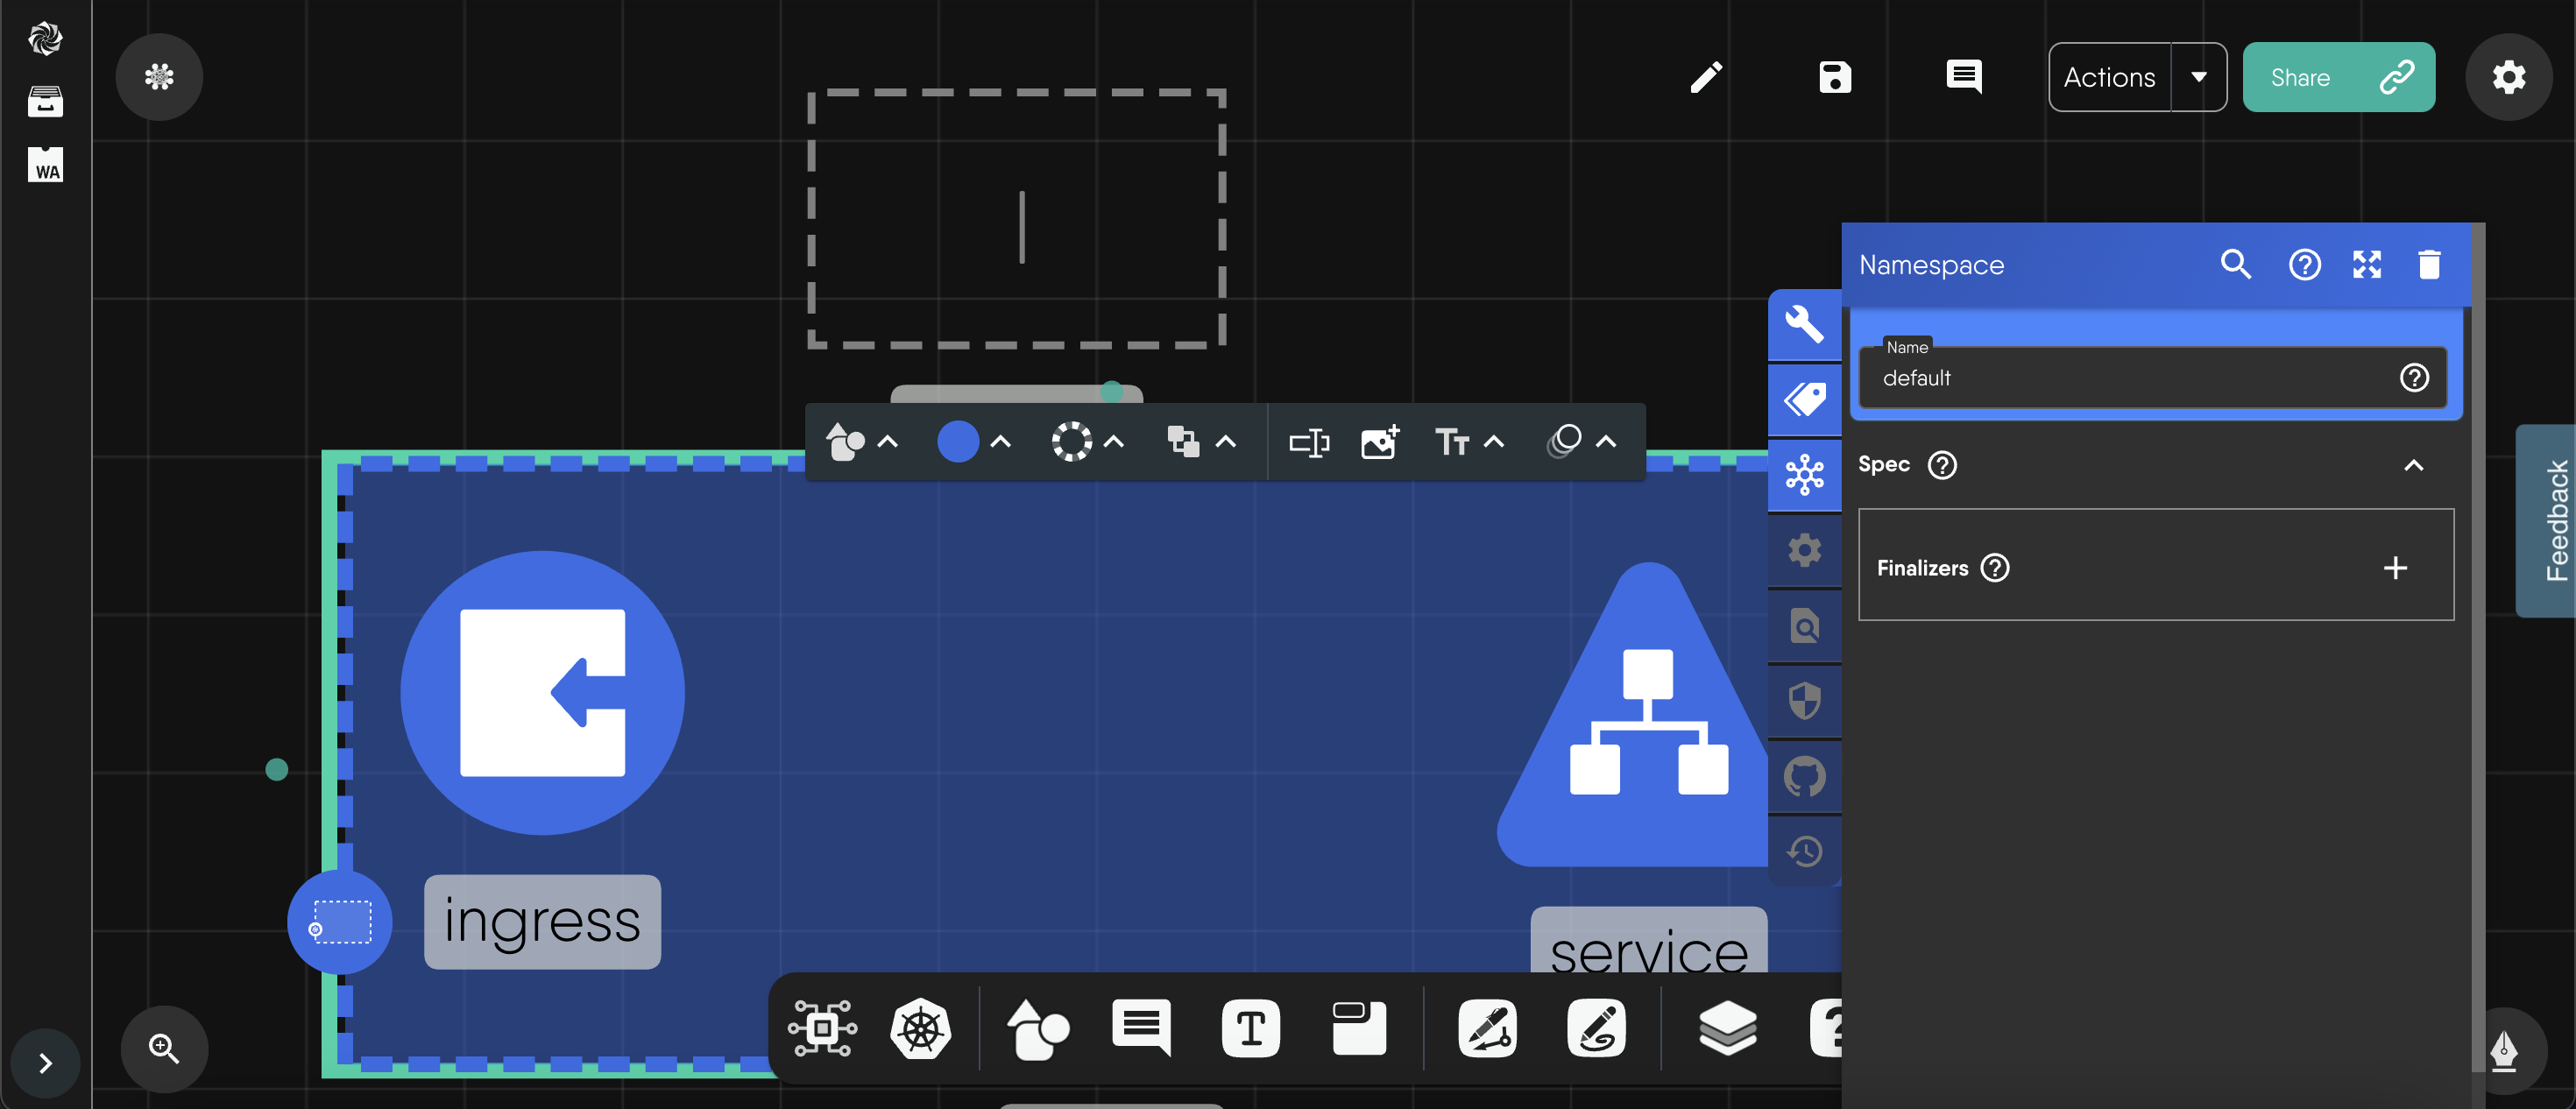
Steps to Configure Components:
Select the Component: Click on the component on the Kanvas canvas that you want to configure. This action opens the Configuration Panel.
Adjust Component Settings: In the Configuration Panel, you can modify various settings, such as resource limits, environment variables, replicas, and more, depending on the type of component you’re working with (e.g., microservices, databases).
Real-time Updates: As you adjust configurations, Kanvas will reflect those changes in real-time, allowing you to visualize how the changes affect your overall design. This feature ensures that the design is always up-to-date with the latest configurations.
By configuring components effectively, you ensure that your cloud-native deployments run smoothly and efficiently, tailored to your specific use case.
Using the Radial Context Menu to Lock, Style, Duplicate, and Delete Components 🔗
Kanvas’ radial context menu provides an intuitive way to interact with components on your design canvas. This menu allows you to quickly perform key actions such as locking, styling, duplicating, and deleting components without leaving the design canvas.
Key Functions of the Radial Context Menu: 🔗
Locking Components: Locking a component ensures it stays fixed in its position on the canvas. This feature is useful when you want to prevent accidental movement of important components during collaboration or further editing. To lock a component, right-click on it to open the radial menu and select the “Lock” option.
Use Case: Locking is helpful when finalizing the design layout, ensuring key components remain in place even when other collaborators make adjustments.
Styling Components: The styling option allows you to modify the appearance of the component, such as changing its color or label. This feature is especially useful for visually organizing components, making it easier to distinguish between different types or states within the architecture.
Use Case: Style components to represent various application states, environments (production vs. development), or priority levels in your infrastructure design.
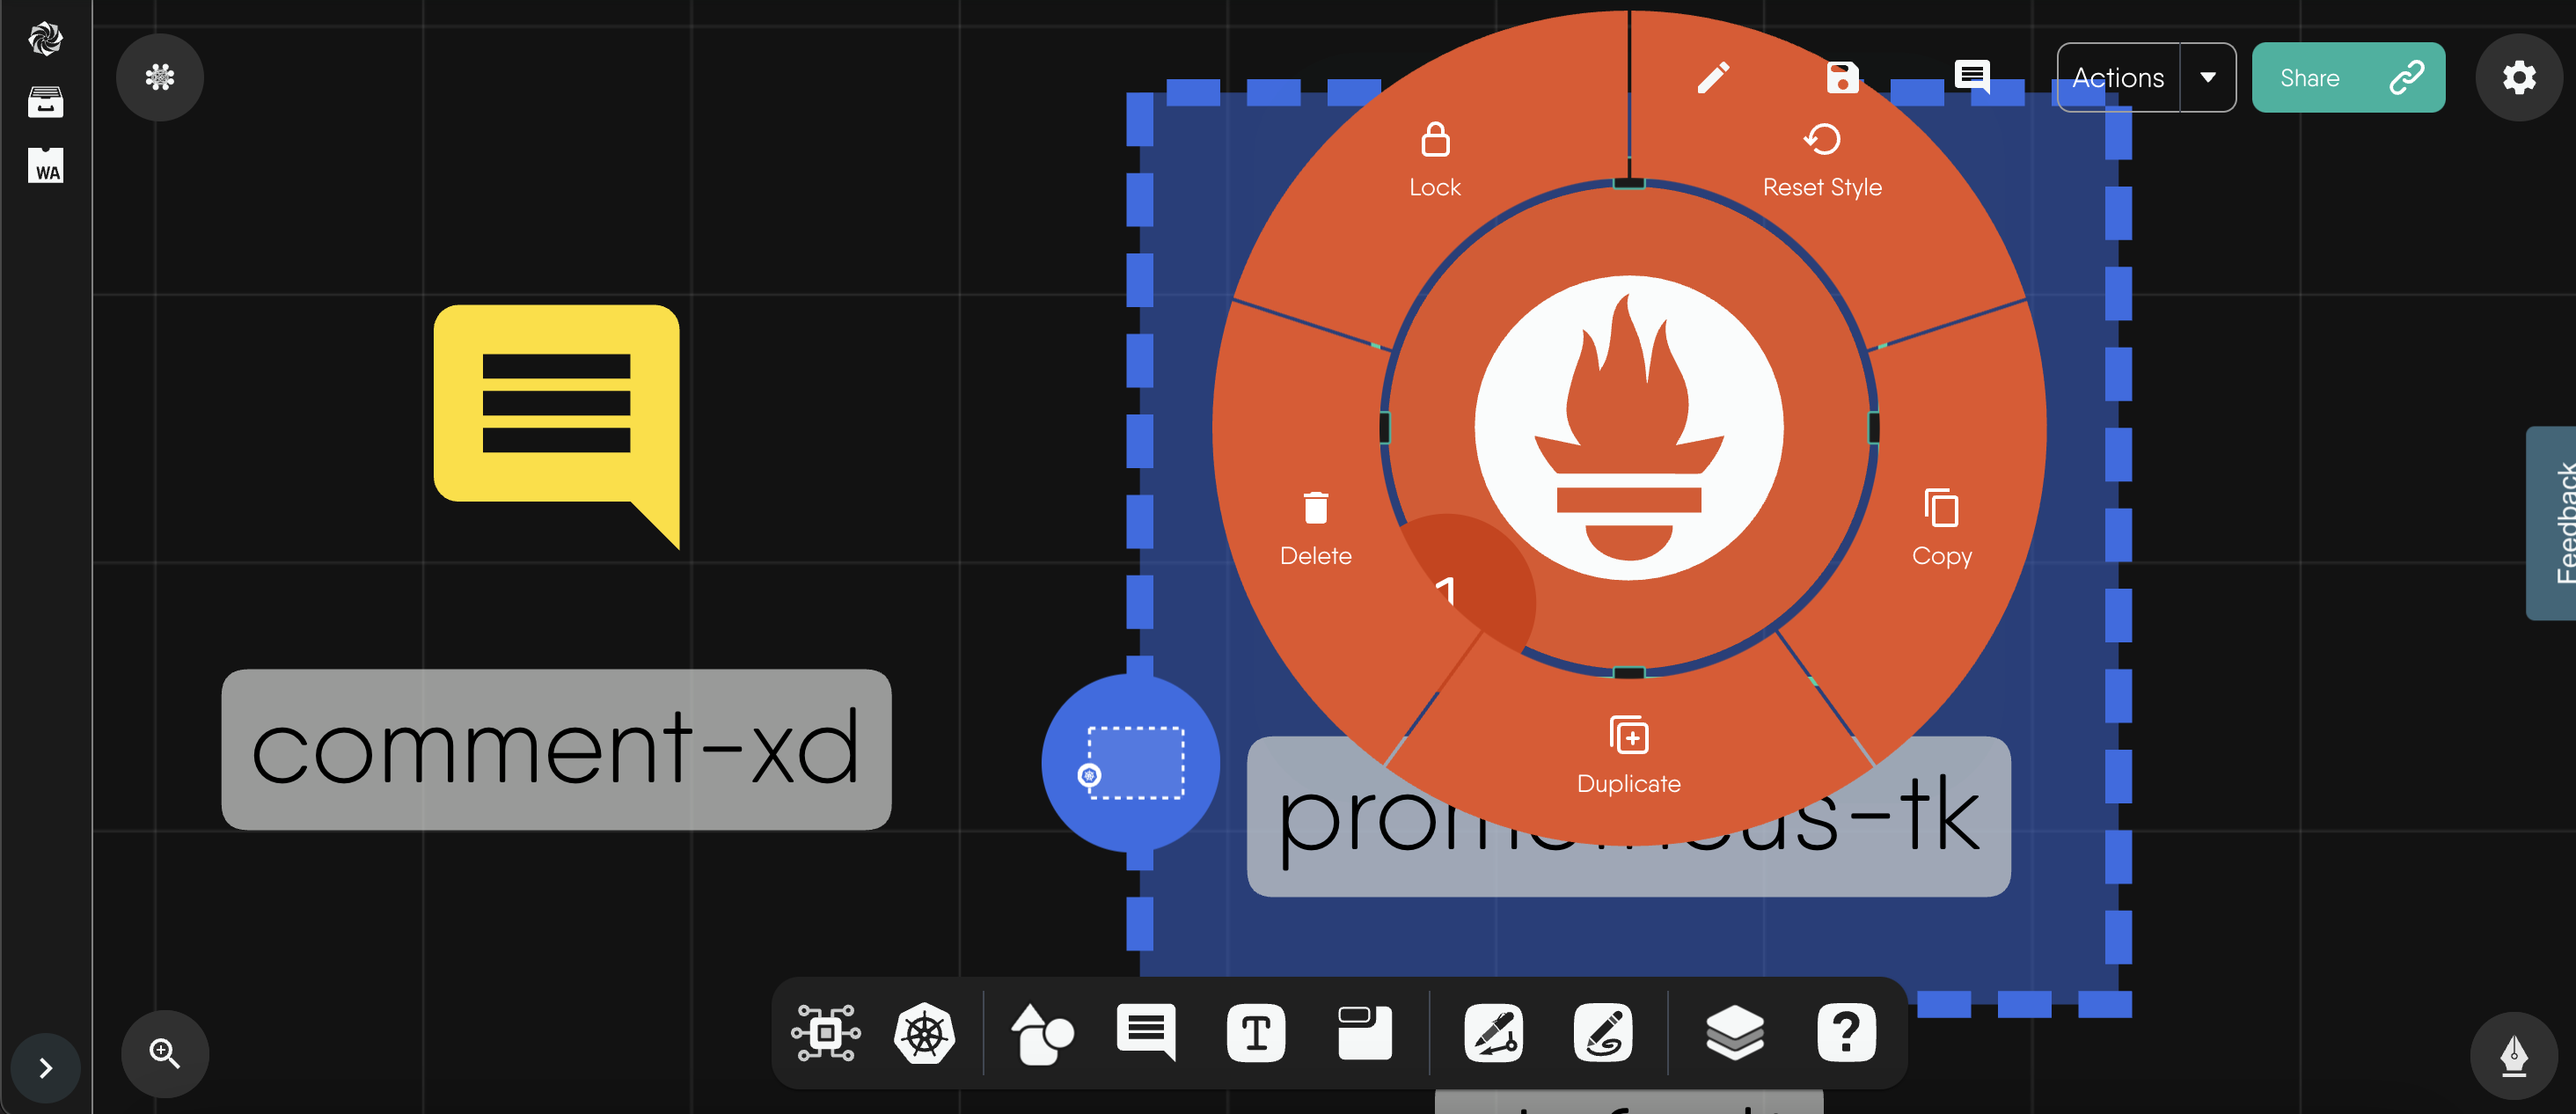
Duplicating Components: The radial menu also provides a quick way to duplicate a component. This feature is beneficial when you need multiple instances of the same component with identical configurations.
Use Case: Quickly create replicas of services or microservices with consistent settings without having to reconfigure each one manually.
Deleting Components: Removing components is as simple as selecting the “Delete” option from the radial menu. This action helps keep the design clean and organized by removing unnecessary or outdated components.
Use Case: Delete components when modifying or refactoring your design to remove legacy infrastructure or redundant elements.
The radial context menu offers an efficient, user-friendly way to manage components within Kanvas, streamlining the design process.
Annotations 🔗
Annotations in MeshMap are a powerful feature that enables you to add contextual information to your designs directly on the canvas. These annotations can take the form of comments, labels, or freehand drawings, allowing for more detailed communication and documentation throughout the design process.
Types of Annotations: 🔗
Text Annotations: Text annotations allow you to add notes or explanations alongside components. This is useful for providing instructions, detailing configurations, or documenting key decisions made during the design process.
Use Case: Leave detailed instructions for collaborators about specific components or workflows within the design. Annotations are especially helpful when multiple team members are working on a project.
Pencil and Pen Tool: The whiteboard feature in MeshMap allows you to use freehand drawings to annotate the design. This is useful for highlighting connections between components, drawing attention to specific areas, or visually brainstorming ideas on the canvas.
Use Case: Use freehand annotations to draw attention to critical connections between services or infrastructure components, or to mark areas that require further review or adjustment.
Pinning Comments to Components: In addition to standalone annotations, you can pin comments directly to specific components. This ensures that feedback or instructions remain attached to the component, even if the design evolves or components are moved around.
Use Case: Pin a comment to a database component explaining the configuration and deployment strategy so that future collaborators can easily understand the logic behind it.
Importance of Annotations: 🔗
Annotations play a crucial role in collaborative design processes. They provide a way to document decisions, share knowledge, and offer feedback directly within the design environment. This minimizes miscommunication and ensures all team members are aligned on the design’s intent and structure.
By effectively using annotations, you enhance the clarity and transparency of your designs, ensuring that they are well-documented and easy for all collaborators to understand.
Copy and Paste Components 🔗
You can copy and paste one or more components — even if you’re going from one design to another.
Use the right-click menu or keyboard shortcuts 🔗
You might be able to copy and paste with the right-click menu, but for security reasons, most browsers don’t allow web apps (like Kanvas) to use your computer’s clipboard through menus.
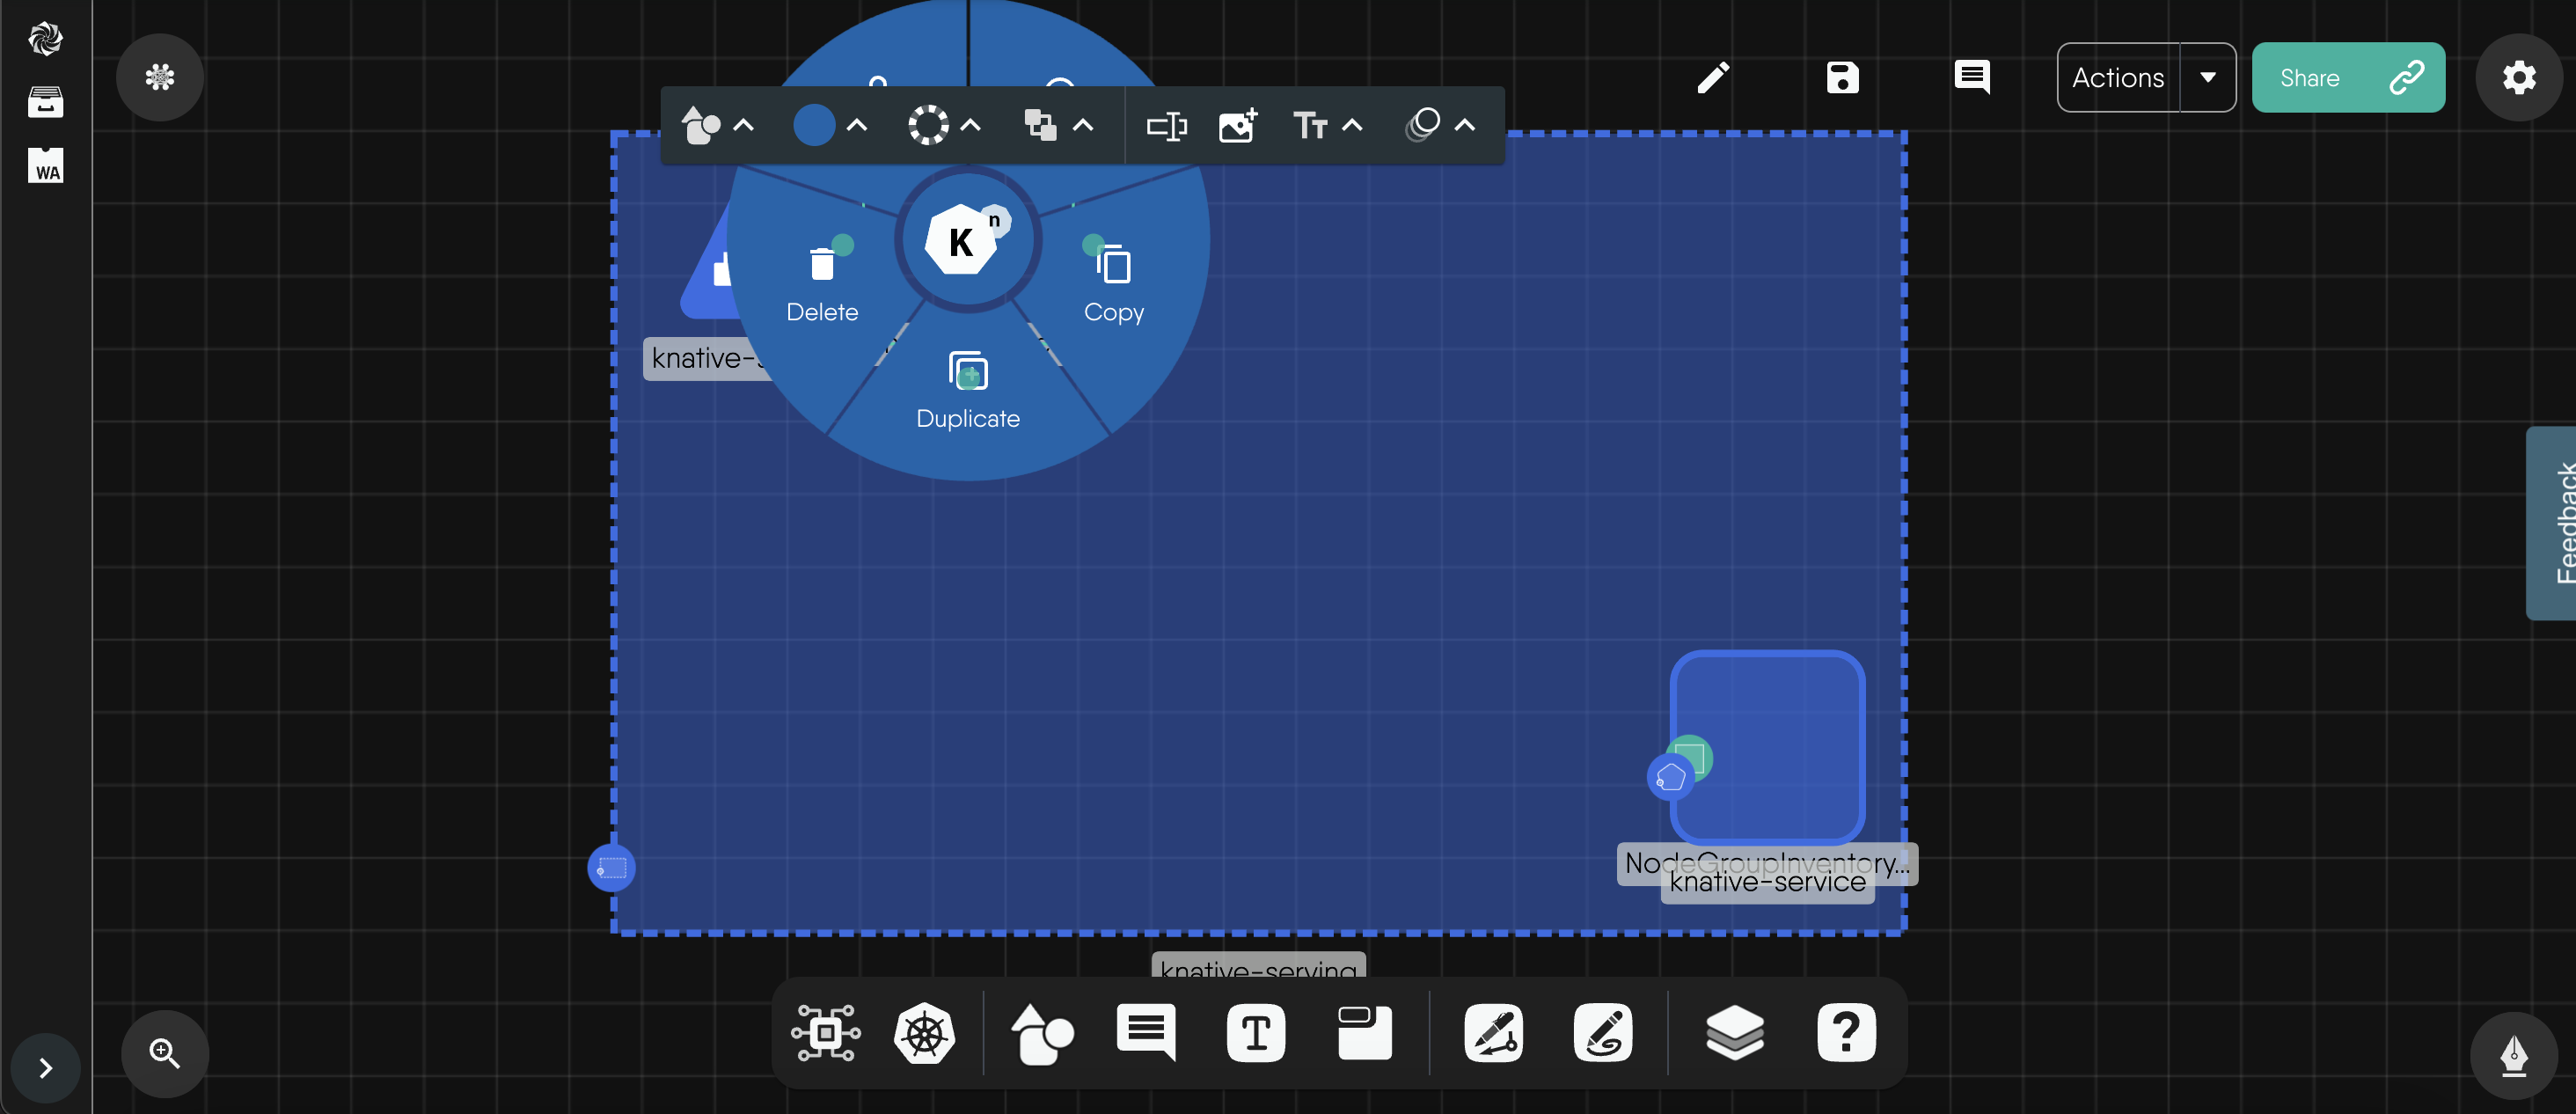
To copy and paste, you can use keyboard shortcuts:
To copy and paste:
- Use keyboard shortcuts
- Use the right-click menu
Select All with Keyboard Shortcuts 🔗
- Select all components on the Kanvas by pressing CMD+A (Mac) or CTRL+A (Windows).
- Copy the selection by pressing CMD+C (Mac) or CTRL+C (Windows).
- Paste the components by pressing CMD+V (Mac) or CTRL+V (Windows).
Use the Right-Click Menu 🔗
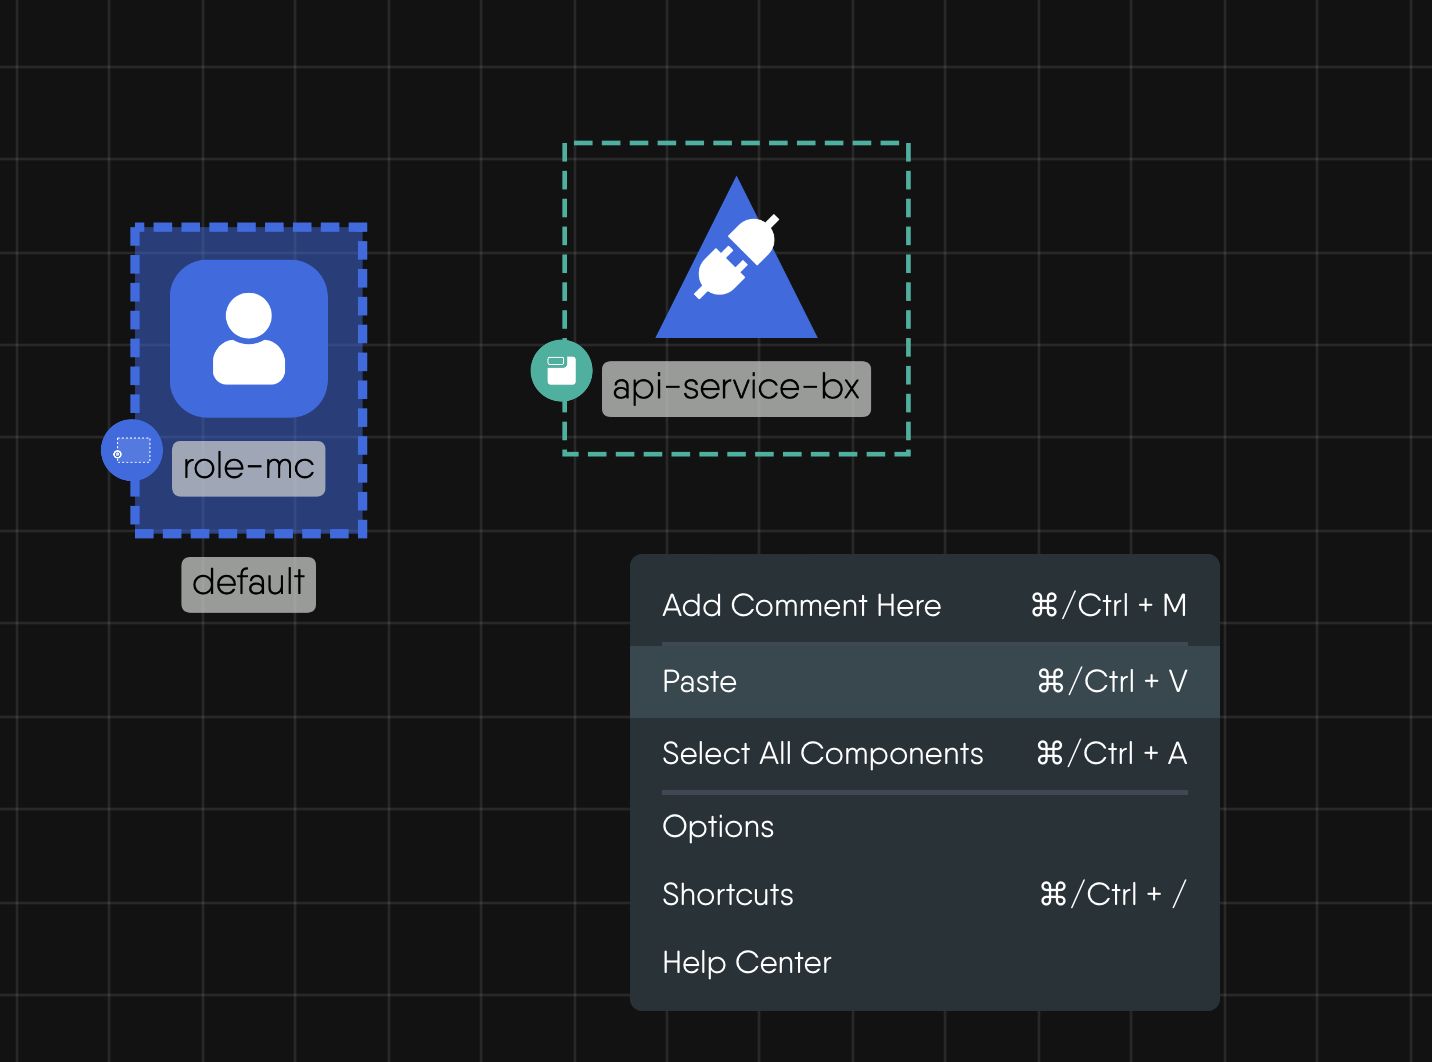
- Right-click on the canvas and select Select All Components.
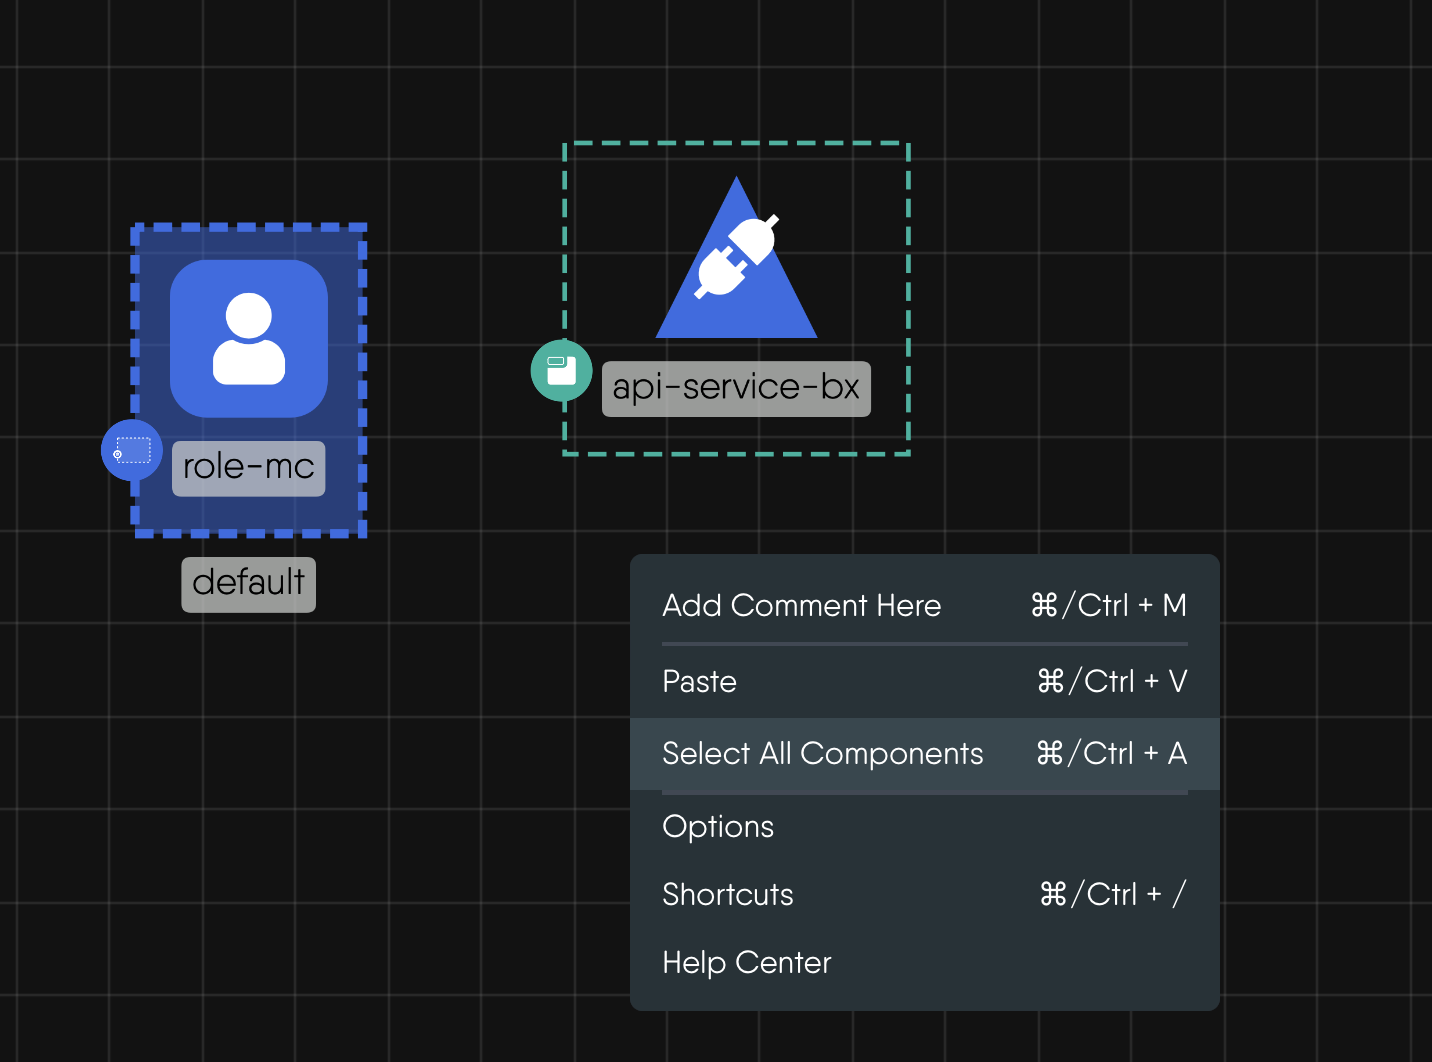
- Right-click again and choose Paste or press CMD+V (Mac) or CTRL+V (Windows) to paste the copied components.
Use the Save As Option 🔗
- Go to the design toolbar and select Save As.
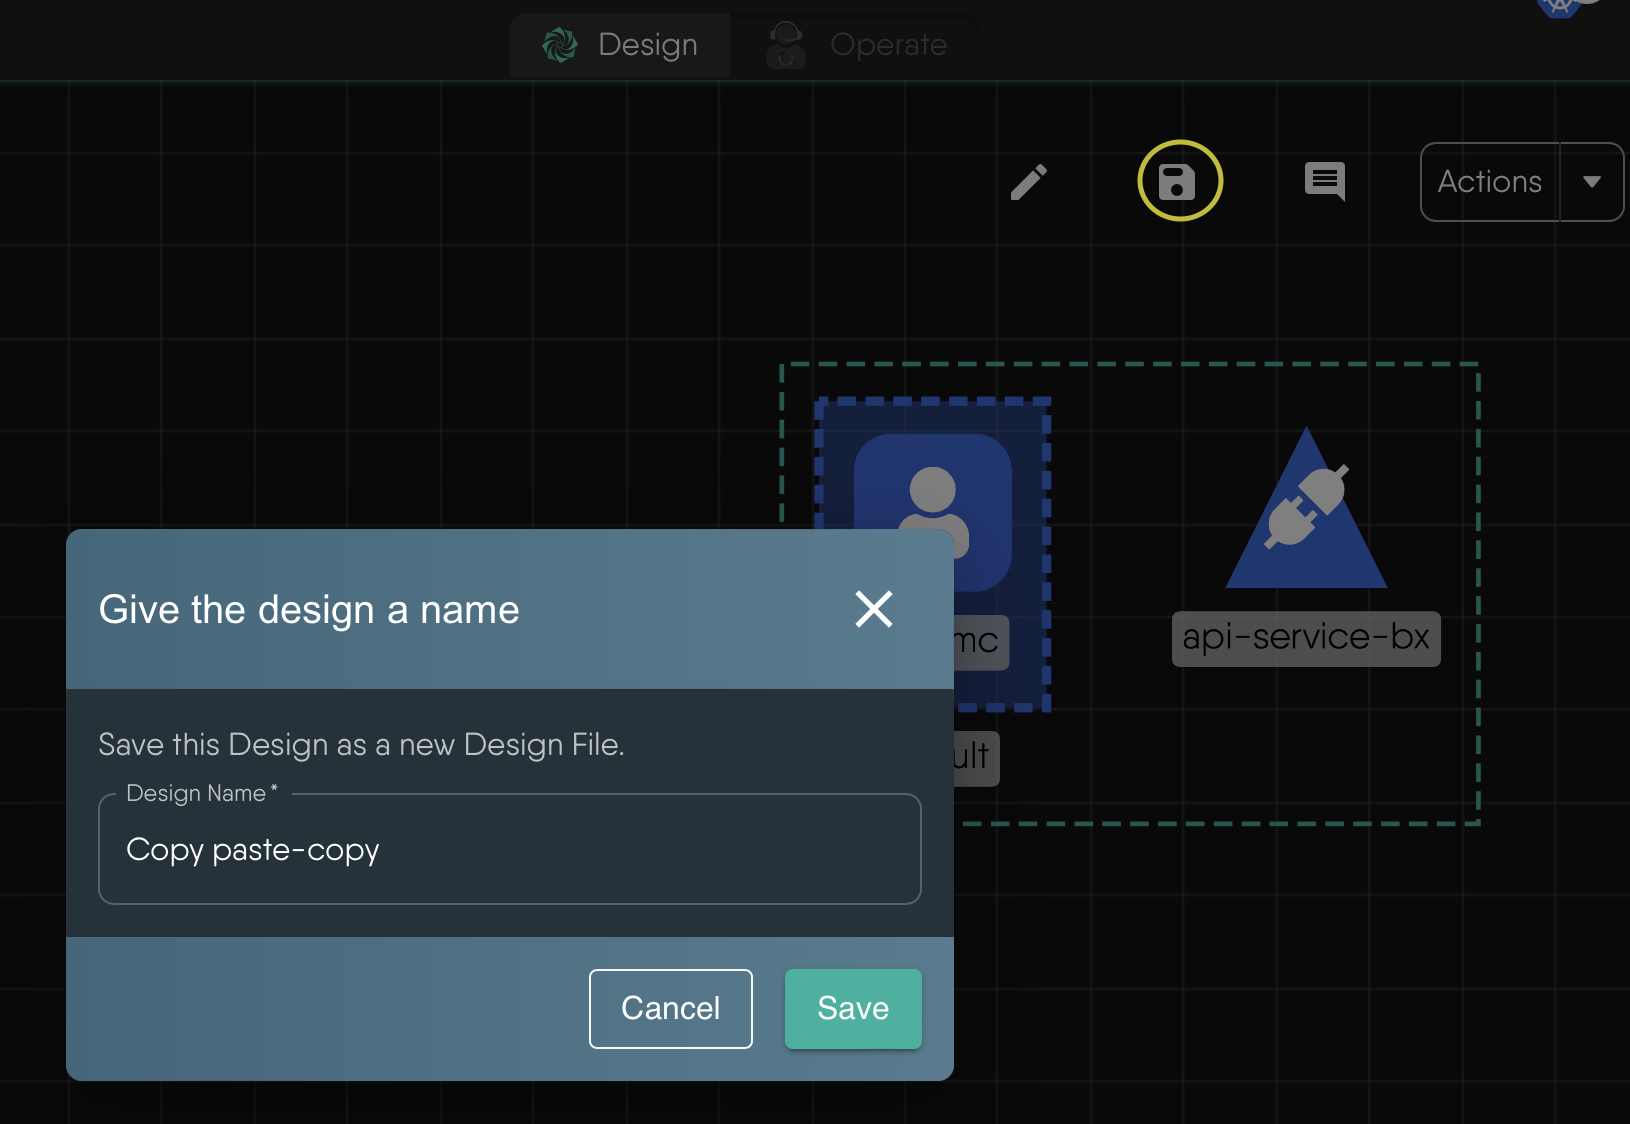
- A copy of all components will be saved in your new design file, which you can then paste into another design.
Select with SHIFT or CTRL 🔗
- Press and hold either SHIFT or CTRL, then click and drag over all the components you want to select.
- Copy the selected components with CMD+C (Mac) or CTRL+C (Windows).
- Paste the components with CMD+V (Mac) or CTRL+V (Windows).
Recent Discussions on Kanvas
- Jul 12 | Unleash Visual Power: Import Your Configs by zihan kuang
- Oct 14 | Explore Meshery's Published Relationship Design Examples by Awani Alero
- Oct 03 | Design Review RFC: Kanvas Empty State Enhancement by Lee Calcote
- Jul 19 | [For Discussion] Visual indication of semantically vs non-semantically meaningful Meshery components by Lee Calcote
- Jun 07 | What are the conditions for a "System is unhealthy" warning? by James
- May 30 | Looking for a meshmate to help with first PR by Faisal Imtiyaz123
- Feb 28 | For Discussion: Capturing potential, but unrealized Relationships in Design Snapshots by Lee Calcote
- Feb 12 | Hint on Scaling & Verifying Cronjob in Playground by Sandra Ashipala


